Once I’m happy with the sketch I scan him into Photoshop. Obviously any software is suitable at this stage as no manipulation is required, so the software which came with your scanner should do the job just as well. 72 dpi and grayscale are fine and will help keep the processing power of your computer from having to work unnecessarily hard. You could even use a digital camera to capture the image if you don’t have a scanner.
Step 2
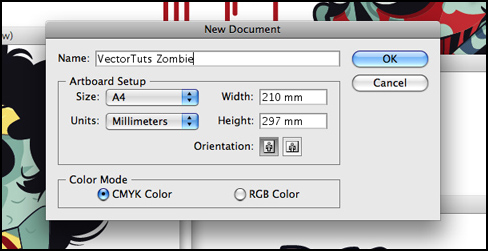
Open up Illustrator and start with an A4 portrait document. I tend to work in CMYK, as alot of my work is for print, but I also find CMYK to be more intuitive when mixing colors.
Once your document is open, import the sketch into the document by going to File > Place and locate your sketch. Once your file is located, check the Template box, which will ensure your sketch is placed upon its own layer. It also gives the layer a faded opacity, which will help in the next step when you are drawing over the top of it.
Step 3
Before we begin creating our little flesh-eater, arrange the document into different layers, each one representing an element of the figure. This figure breaks down into five main groups: “Head,” “Body Front Arm,” “Back Arm,” and “Guts.” I create a new layer for each of these items, and this will help keep things organized as the illustration progresses.
Step 4
For this step, I am going to draw around the sketch of the zombie using the Pen Tool (P). At this point, I have a black stroke with no fill. This way I have the ability to see every element even if they overlap.
I begin with the head, working on the “Head” layer, and draw around each element. As I draw, I keep in mind which elements lay on top of each other, starting with the furthest away and building up until I have a line drawing of the whole head. I then repeat the process for each element until I have the whole zombie.
Step 5
Once I have the complete zombie, I select it all and change the stroke to white and give it a black fill. This will show me which elements are in the wrong order.
I see that the sockets of the eyes are sitting in front of the eyeballs. To move them back, I simply select the sockets and send back a step (Object > Arrange > Send Backward), repeating the process until everything is in the correct order.
Once I’m happy, I begin to block out the basic colors. At this point. I only need four colors: blue (skin), purple (clothes), red (gore), and dark blue (outline). I mix these colors up in the color mixer and add them to my palette, then apply them to the relevant areas.
Step 6
Now that I can see the linework, I’m going to go around the piece and tweak the line weight where I think it’s required. I like the line weight to be nice and chunky, so using the Direct Selection Tool (A), I grab the points on the outline which are then tweaked to my liking.
Also at this point, I notice that the teeth have no outline. I select the teeth using the Select Tool (V) and make a direct copy (Edit > ;Copy), which I then paste directly below the originals (Edit > Paste in Back). Then I recolor the new teeth, set the color to black and once again, and resize the outline using the Direct Selection Tool (A).
The left eye currently sits outside the socket, so we just need to poke that bad boy back into his hole. Using the Selection Tool (V), select both the eyeball and the socket, then with both selected navigate over to the Pathfinder window and apply Intersect Shape Areas.
This will remove all the areas outside of what eyeball is peering through the socket. For future reference, if we were to now click on the Expand button located on the Pathfinder window, this would remove all the invisible areas, leaving just the white shape of the eye behind. However, since your eyeball may not be peering in the desired direction at this point, we’ll leave it as it is.
Step 7
OK, so right now we have a straightforward little blue guy, and what we want to do is mess him up a little. You can hack into your artwork any way you please, but in this instance I’m looking at that top lip, which in my original sketch is tattered and torn.
First, I draw the shape of the ripped flesh using the Pen Tool. Once I have a shape I’m happy with, I then select the blue face shape and make a copy, which I then paste directly above (Edit > Copy, Edit > Paste in Front). I also perform the same action for the tattered flesh shape.
With both the copies selected, I once again use the Pathfinder palette and this time I apply the Subtract From Shape Area option. This punches the top shape through the bottom shape, and you are left with the tattered bottom lip. Now click on the Expand button we talked about earlier and you will be left with one shape
Now repeat the same steps with the right eye socket, so we can knock the eyeball back (Object > Arrange > Send Backward) behind the socket. We now have both eyes peeping from within the skull!
Step 8
Now that the face is the shape we want we can create the outline for it. Make a copy (Edit > Copy) and then paste the copy directly behind the original (Edit > Paste in Back). With the object still selected, use the Eyedropper Tool (I) to change the color to black. Now use the Direct Selection Tool (A) to resize and tweak the linework to create a nice chunky outline.
Step 9
I’m now approaching the point where I have the zombie in one piece, so before I start working on the little details I’m going to color the rest of his clothing. The colors I mix for my zombies should have that touch of grubbiness about them, so whatever colors I choose I throw in some black on top. This is where creating the document in CMYK helps, as it’s easier to mix your palette together.
Step 10
Now that I have my colors, I want to give my zombie a bit of depth and to do this I’m going to add some shading. First of all I decide which direction the light is coming from, in this case from the left. Now using the Pen Tool, I begin creating the areas where the zombie’s skin is lighter and the areas which will be darker.
Once I have created the shapes, I mix up a lighter version of the zombie flesh tone and a darker version. Next, I apply these colors to the shapes just created. With the shapes still selected, I drag their layers so the shapes sit below the face shape.
Select the layer with the face shape on top and with all three layers selected I create a new layer mask (Object > Clipping Mask > Make). The top object, in this case the face, becomes a mask with the two other shapes within it. The mask at this point will become invisible, so ensuring only the face is selected, navigate to your swatches where you can reapply the zombie skin color.
Repeat this process for each element until you have shaded the full figure.
Step 11
Now is the time to add the smaller details to the figure, like creases in the clothing and cracks in the skin. Using the Paintbrush Tool (B) and a brush I have previously created, I move around the relevant layers and start painting in the details. You can create your own brush, or use one of the brushes which come with Illustrator. I use the Pen Tool (V) with a black fill and no stroke for larger areas.
Step 12
Now that we have our zombie, we need some blood! I apply the blood the same way that I applied the shading, using the masks I have previously created. However unlike the shading, the blood applied to the figure has the opacity altered.
For this figure, I’m just adding blood stains to where he has wounds, so that means his face, arm, and chest. A lower opacity allows for the details behind these stains to show through, giving a little more depth.
Step 13
This little fellah still needs some added gruel I feel, and with a stomach wound like that, I think a pool of blood is the way to go. I create a new layer that I call “POOL” and place it below all the other layers.
Within this layer, I draw a puddle shape that I then color red. I then make a copy of the lower half of the zombie, and group (Objects > Group) the copied elements together. These grouped items are then placed into the “POOL” layer. Using the Free Transform Tool (E), I flip the group horizontally and then transform it so that it is a shorter reflection of the original zombie figure.
Once I’m happy with its size and position, I select it along with the pool shape and create a mask of the pool shape with the reflected figure within it. Now to give the reflection that crimson tint I simply draw a red shape above the reflection within the pool mask. Once again I alter the opacity to ensure you can se the zombie reflection through it.
Step 14
I want to soften the skin of the zombie, so I select all of the shaded and lit areas which I have masked off earlier in the tutorial. I than apply a gaussian blur to these areas. This gives the skin a spongier feel, as every zombie should have
Source:
http://vector.tutsplus.com/tutorials/character-design/how-to-create-a-stinking-zombie-flesh-eater-in-illustrator/